Cut Apart the Expensive Board
I could have done the simple fix.
But that's not how we roll here. We do things the incredibly more expensive and complicated way. Like say, replacing both foil tracks completely (the track on the other side was undamaged, did not need to be repaired) and extending them to run all the way to the back of the board. And making them much stronger than the original. I had a couple reasons for this: First, I did not know how much water had gotten in the board, and where. So opening up more of the bottom would be good to make sure I got everything dry. Second, I was already mounting the foil as far back as I could in the tracks, and being able to go further back would be really nice. Third, the new Slingshot foil boards have "out-the-back" foil tracks, which look like they make it way easier to connect/remove the foil, so I wanted them too. Fourth, at the time I was still unsure if a defect in the foil tracks had led to the crack, and thought it was a good idea to get a better look at their construction. So, how do you rebuild foil tracks for a windsurfing board. Sure, you can go find videos on Youtube of people popping pre-made foil track inserts into wing and surf boards. But wind-foiling puts a lot more load on the foil-to-board joint than winging or SUP/prone foil...
When sailing upwind on a windfoil, You end up standing on the rail of the board to counteract the force of the sail. Normally your body weight and the force form the sail balance, so the force on the foil is going mostly straight down. However... say you de-power the sail briefly for some reason. Suddenly, the board is not balanced, and that puts a lot of torque on the foil-to-board connection. We end up with a lever system: the distance from the center-line of the board to where you're standing on the edge of the board is one arm of the lever, and the distance from the center-line of the board to the foil-track bolts is the other. For my board, this turns out to be 17" and 1.7" respectively. In other words, a 10:1 lever that multiplies my 220 pounds on the rail of the board to 2,200 pounds of tension split between the foil-track bolts... Two thousand pounds is quite a bit. This is pretty different from winging or surfing where you keep your body weight mostly centered over the foil, not way out on the rail. You don't end up with nearly as much of a lever multiplier on the mast-board joint. So for windfoiling, a simple plug and play foil track insert seems a little weak to me.
We need to make an extra-strong track insert layup. I stared at the board and thought for a while and planed it out in my head. Then I bought a bunch of stuff!
-
Step 1: Buy some parts! What parts?
- New foil track inserts ($60). Long ones. They better be fiber-reinforced nylon or something else high quality. I got some from Chinook: here
- Epoxy ($70). I got some Total Boat 2:1 epoxy with the medium hardener, it's good stuff. Use the slow hardener if it's summertime. I got a quart, used ~1/3. here
- Some plain weave 6oz carbon fiber cloth. I used about 1yard x 50in. Make sure it comes on a roll, not folded. If I was to do this again, I would probably get some carbon biaxial cloth too
- Some plain weave 4oz fiberglass for the outer layer
- some biaxial fiberglass scraps to for filler
- Epoxy additives. I used some milled fiberglass and silica to make thickened epoxy for filler.
- Peel-Ply cloth. It helps get air bubbles and excess epoxy out of the layups.
- Plunge Router ($200) because I did not have one. Get something small but high quality. Skimping on important tools is bad. I got this one on amazon for a reasonable price.
- Some router bits ($40). The carbon/epoxy/nylon is unhealthy for carbide bits, so get cheap ones on amazon. A 3/8" straight cut 2" long bit for most of the cutting. A flush trim bit for finishing the tracks, a 5/16" dia x 3/4" height bit for cleaning the foil tracks (5/16" is just about the width of the track opening), and a 1/2" dia x 1/4" length bit for cutting the t-nut slot in the bottom of the tracks (the 1/8" bit-to-shaft overhang is the same as the t-nut overhang).
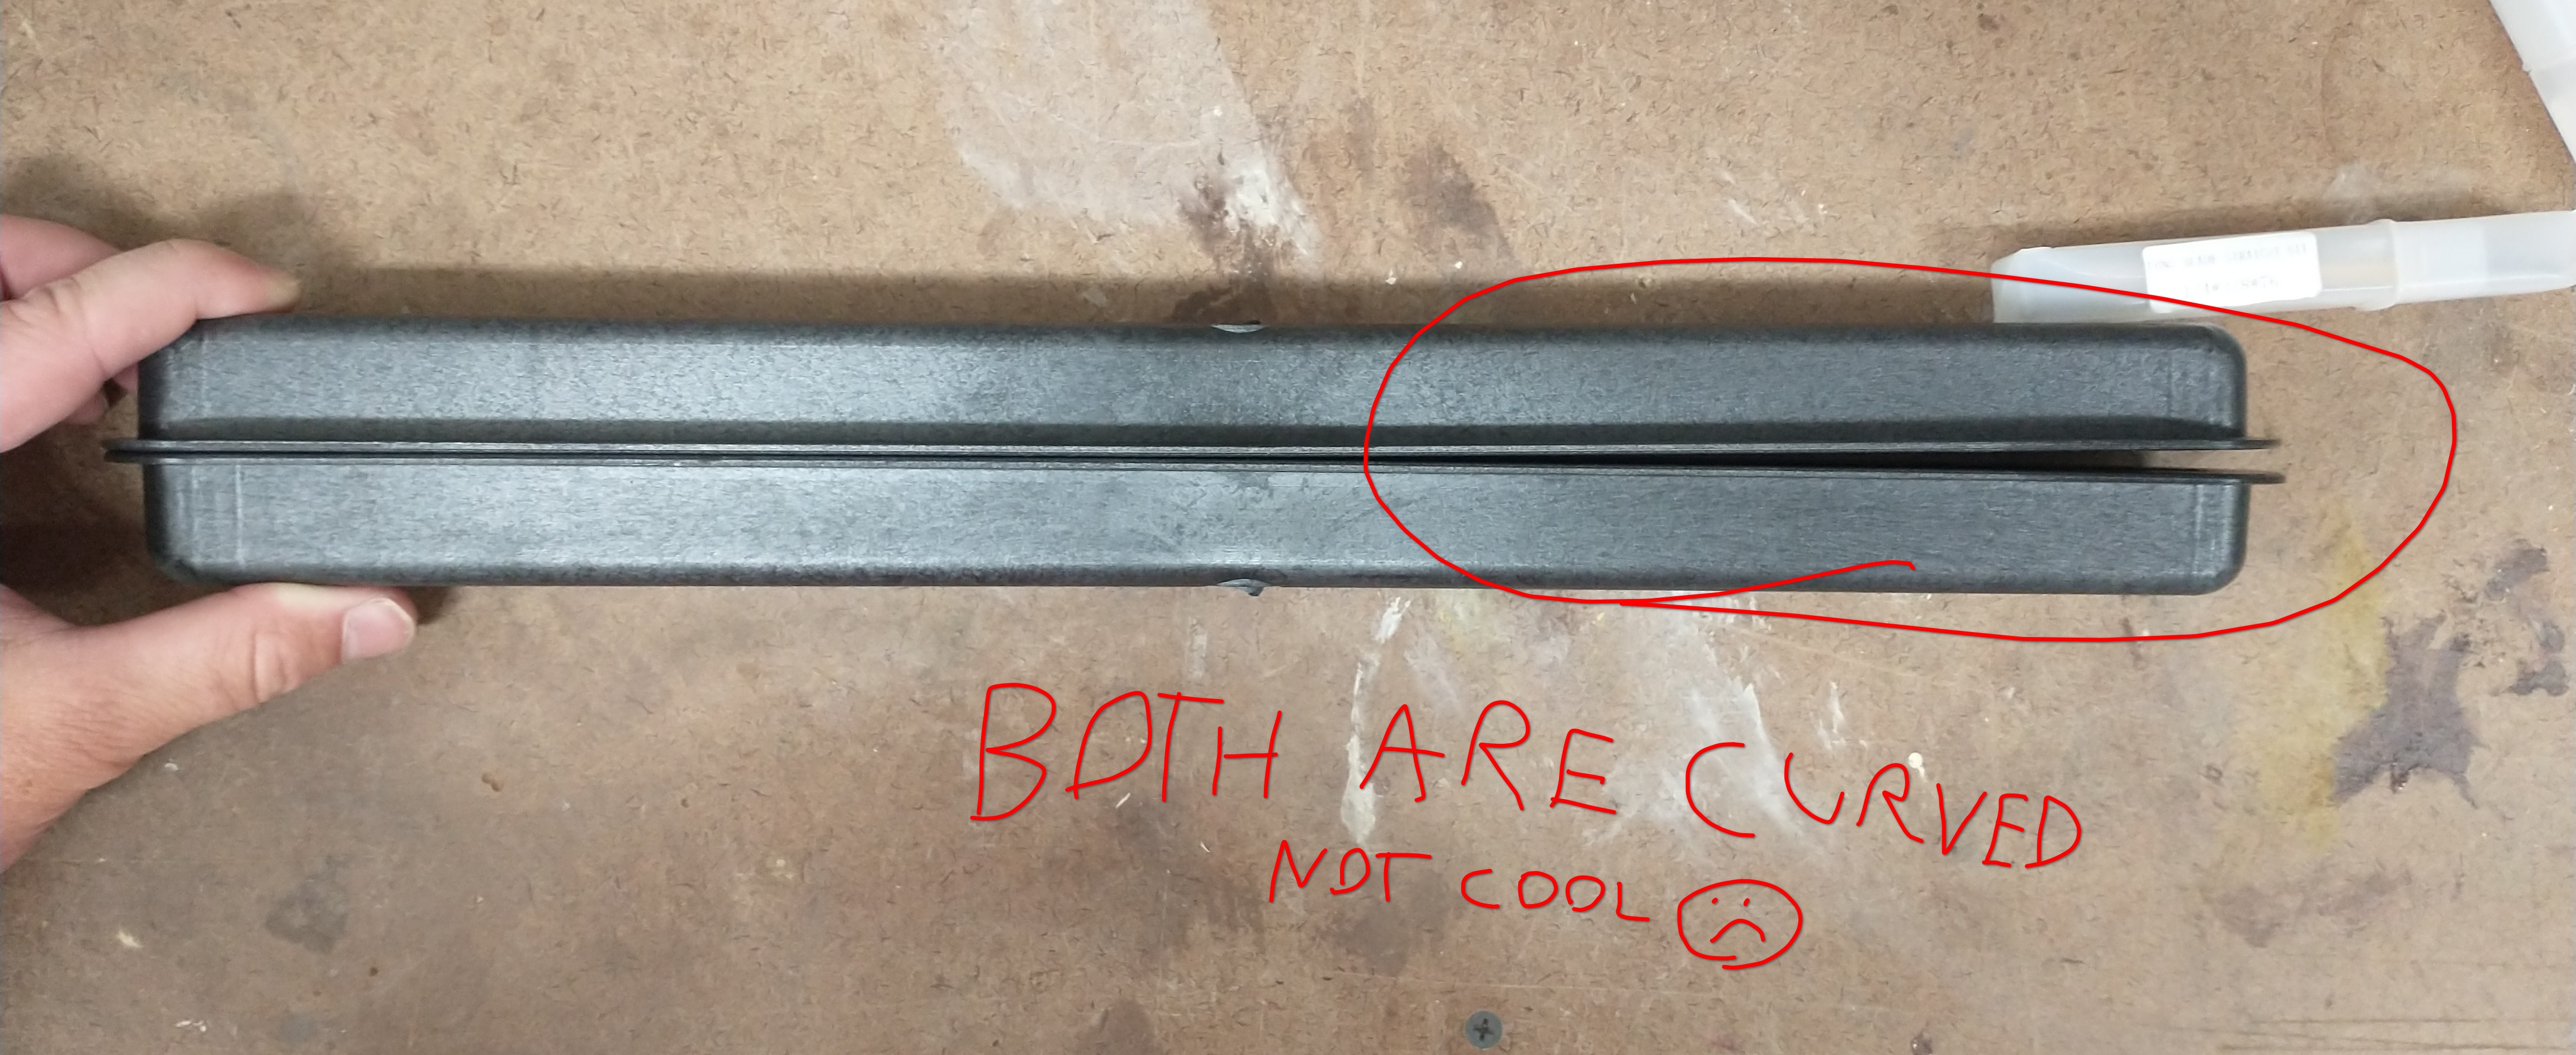
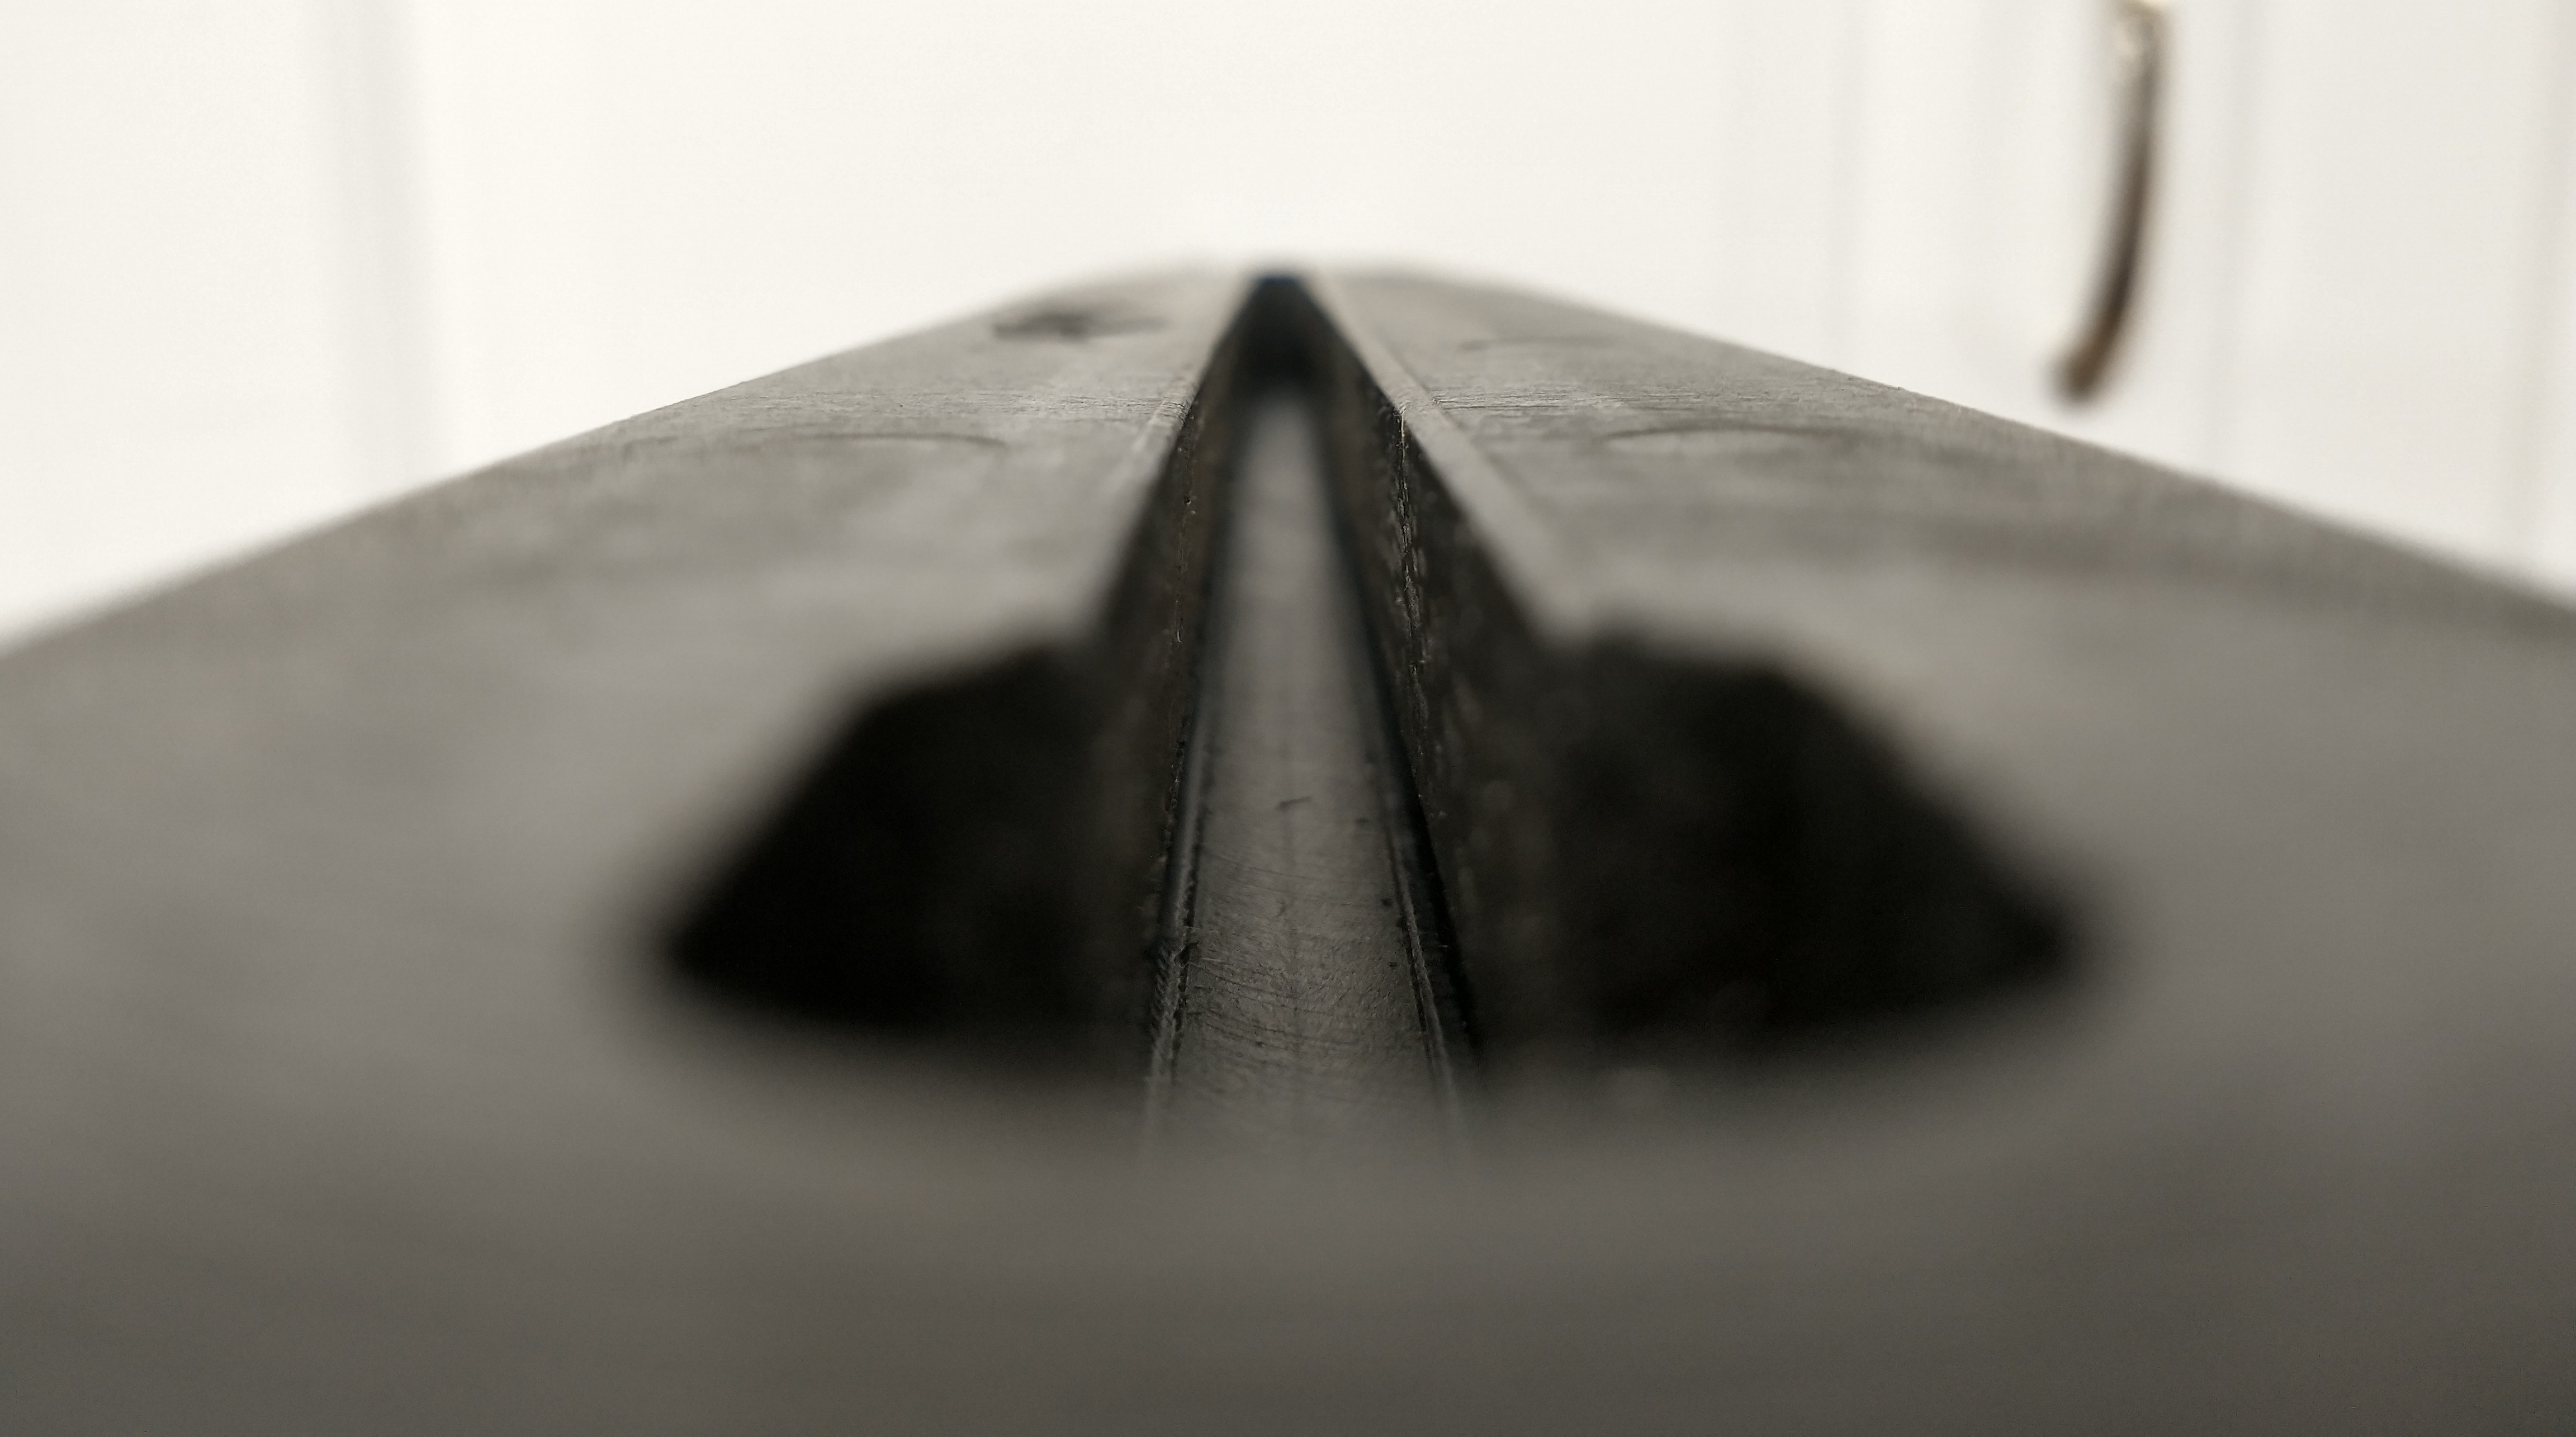
The foil track inserts were kinda the critical part, as you need to have them in hand to figure out how they will fit on the board, before drawing lines and cutting. They plastic seemed high quality, but damm it Chinook, They aren't frikin FLAT. Being flat is kinda a important quality of something you want to mount in a flat surface. Because if the insert is not flat, then it makes the surface not flat, which makes it bad for mounting a flat object like the top of the hydrofoil mast! Fix you're molding process! I used them anyways, because I was covering over them with a pretty thick layup, that I would be able to sand dead flat. And because it's probably not just a defect with the pair I got, but something in their manufacturing process. And Chinook makes the only 16" long foil tracks. *sigh*
-
Step 2: Make some STRAIGHT and ACCURATE reference lines on the board with the right color sharpie. Really, this is pretty critical, take you're time. You don't want squiggly foil tracks. They suck.
-
Step 3: Get a hold of a good plunge router, with some straight cut bits, and go to town on that board. Reinforced carbon fiber, epoxy, and fiber-filled nylon really don't play nice with carbide router bits, so get some cheap expendable ones off amazon. Just freehand router out between the lines you drew. Don't let your hand slip, you wouldn't want to damage the board. It's kinda like doing a coloring book with permanent markers spinning at 25,000rpm, except messing up is bad, and the book cost a months income. Don't get stressed out, it's easy.

Make sure to test fit everything often:
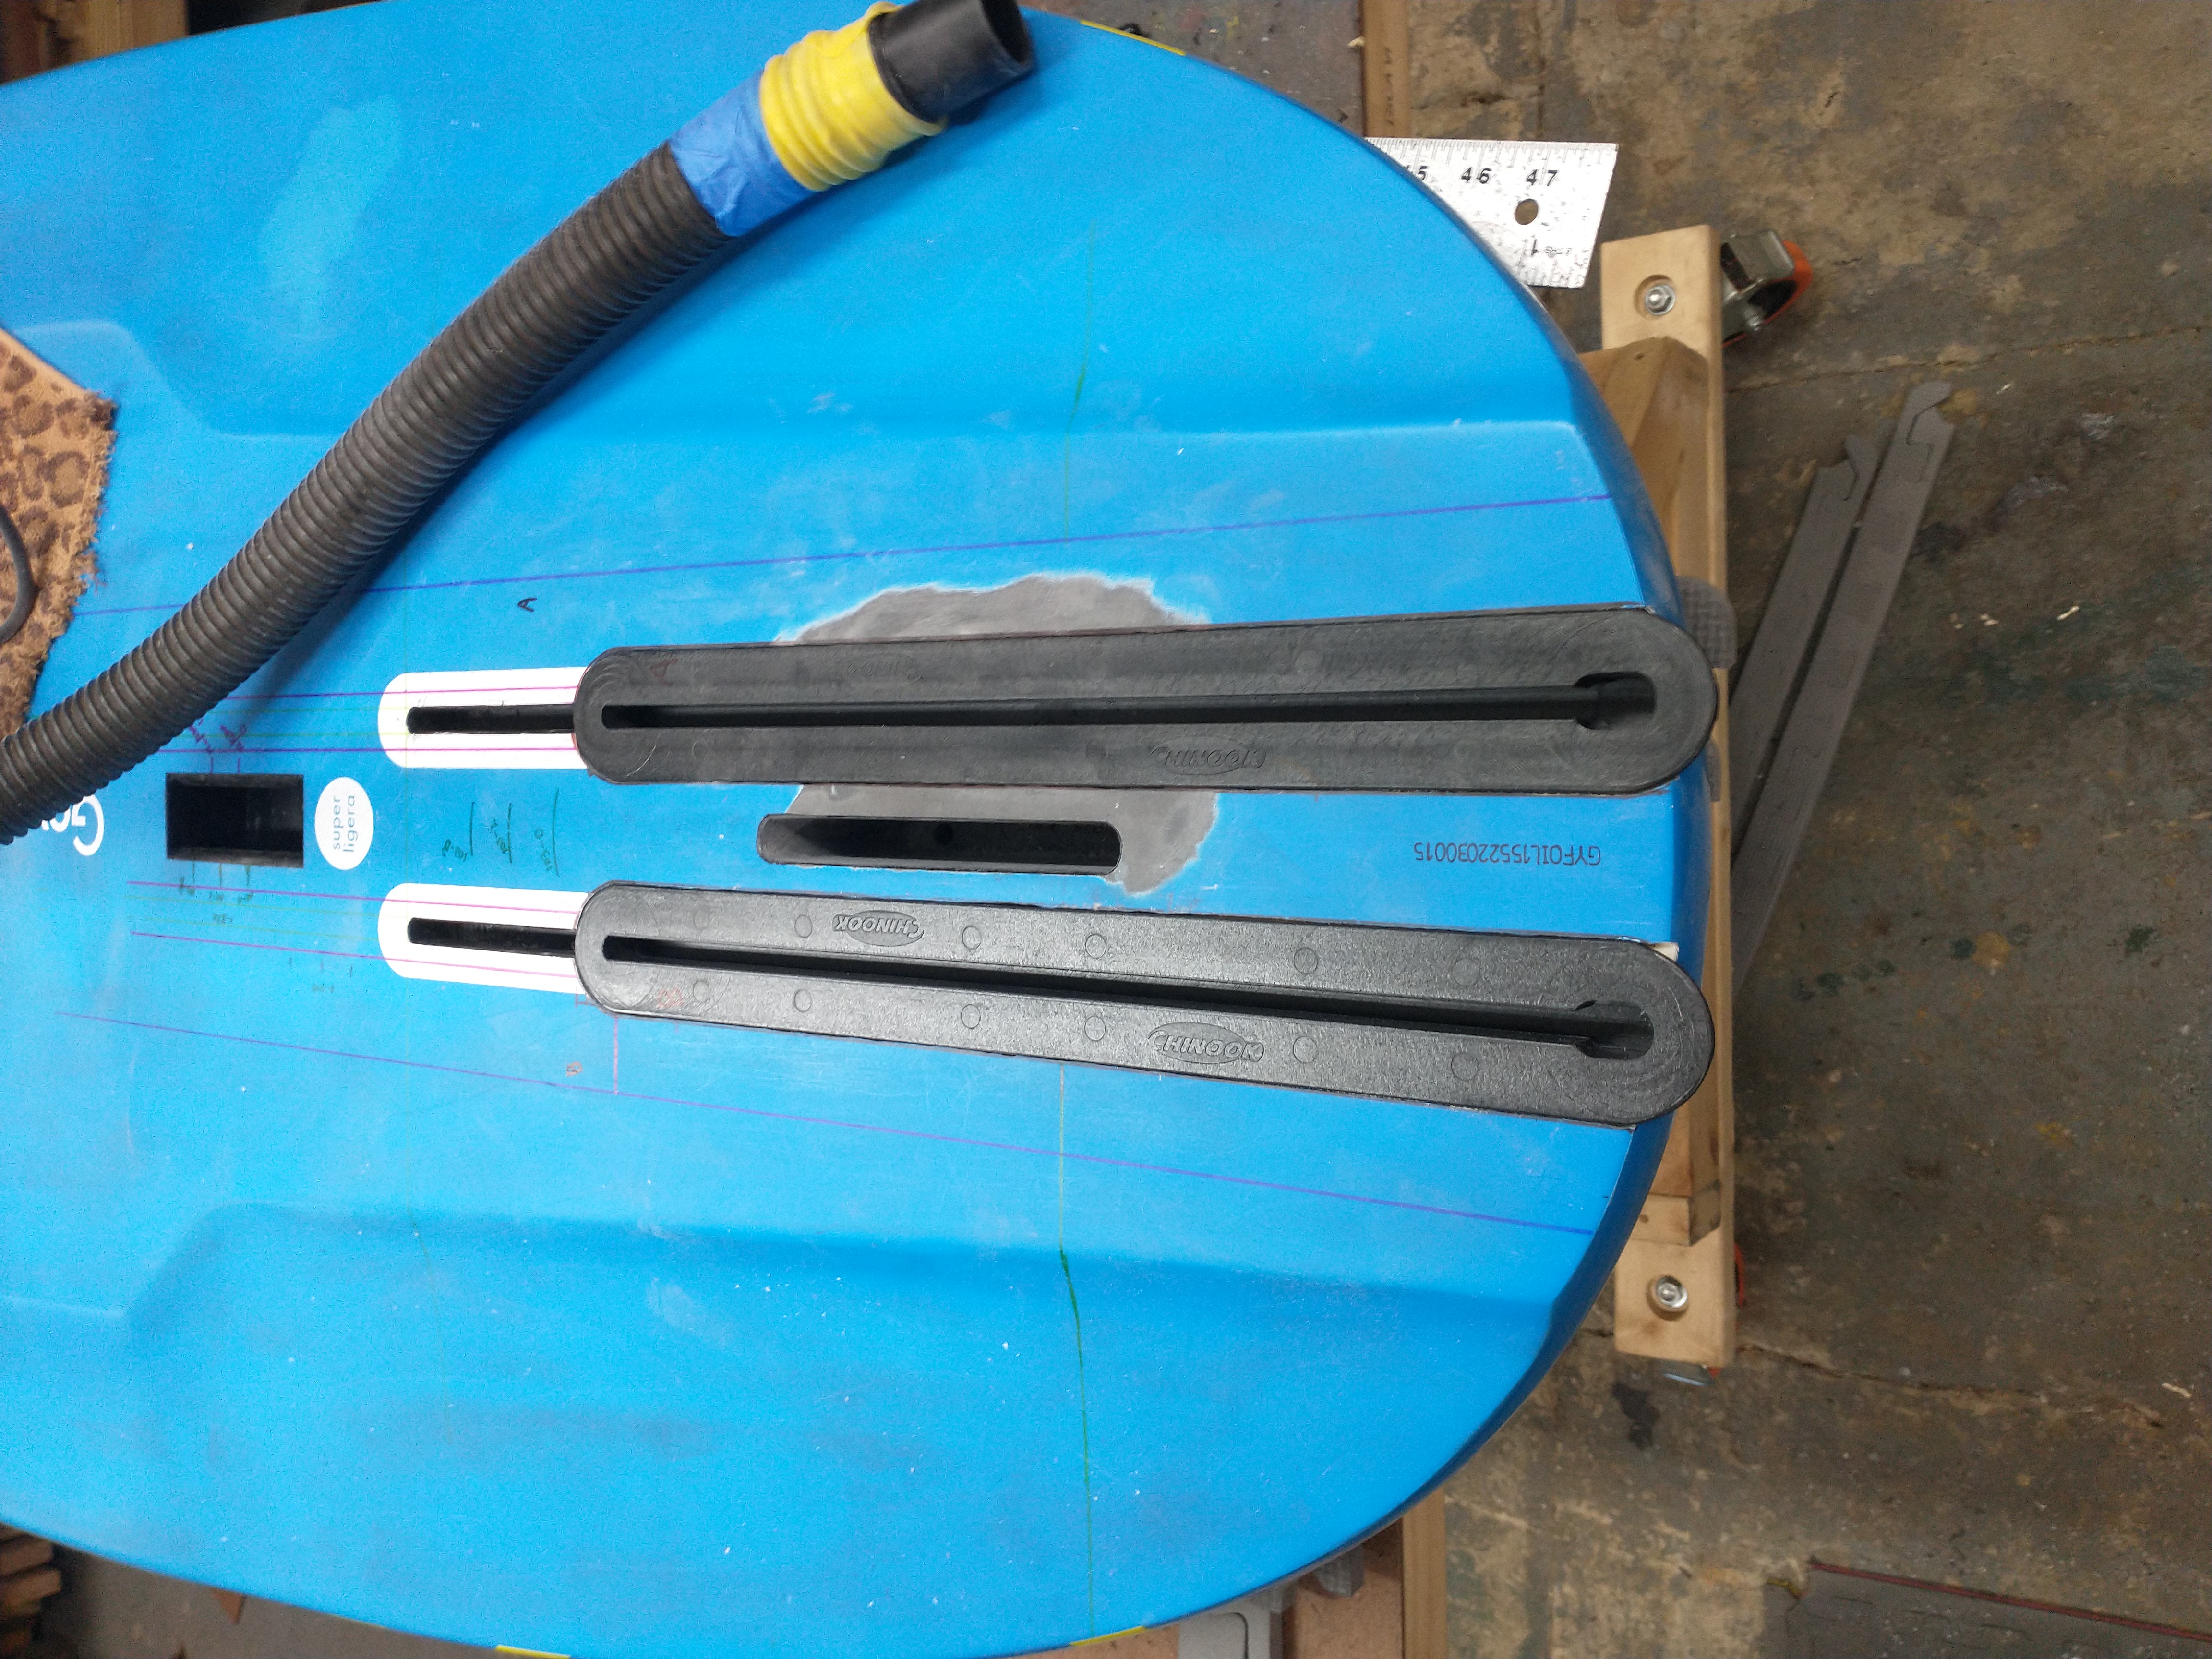
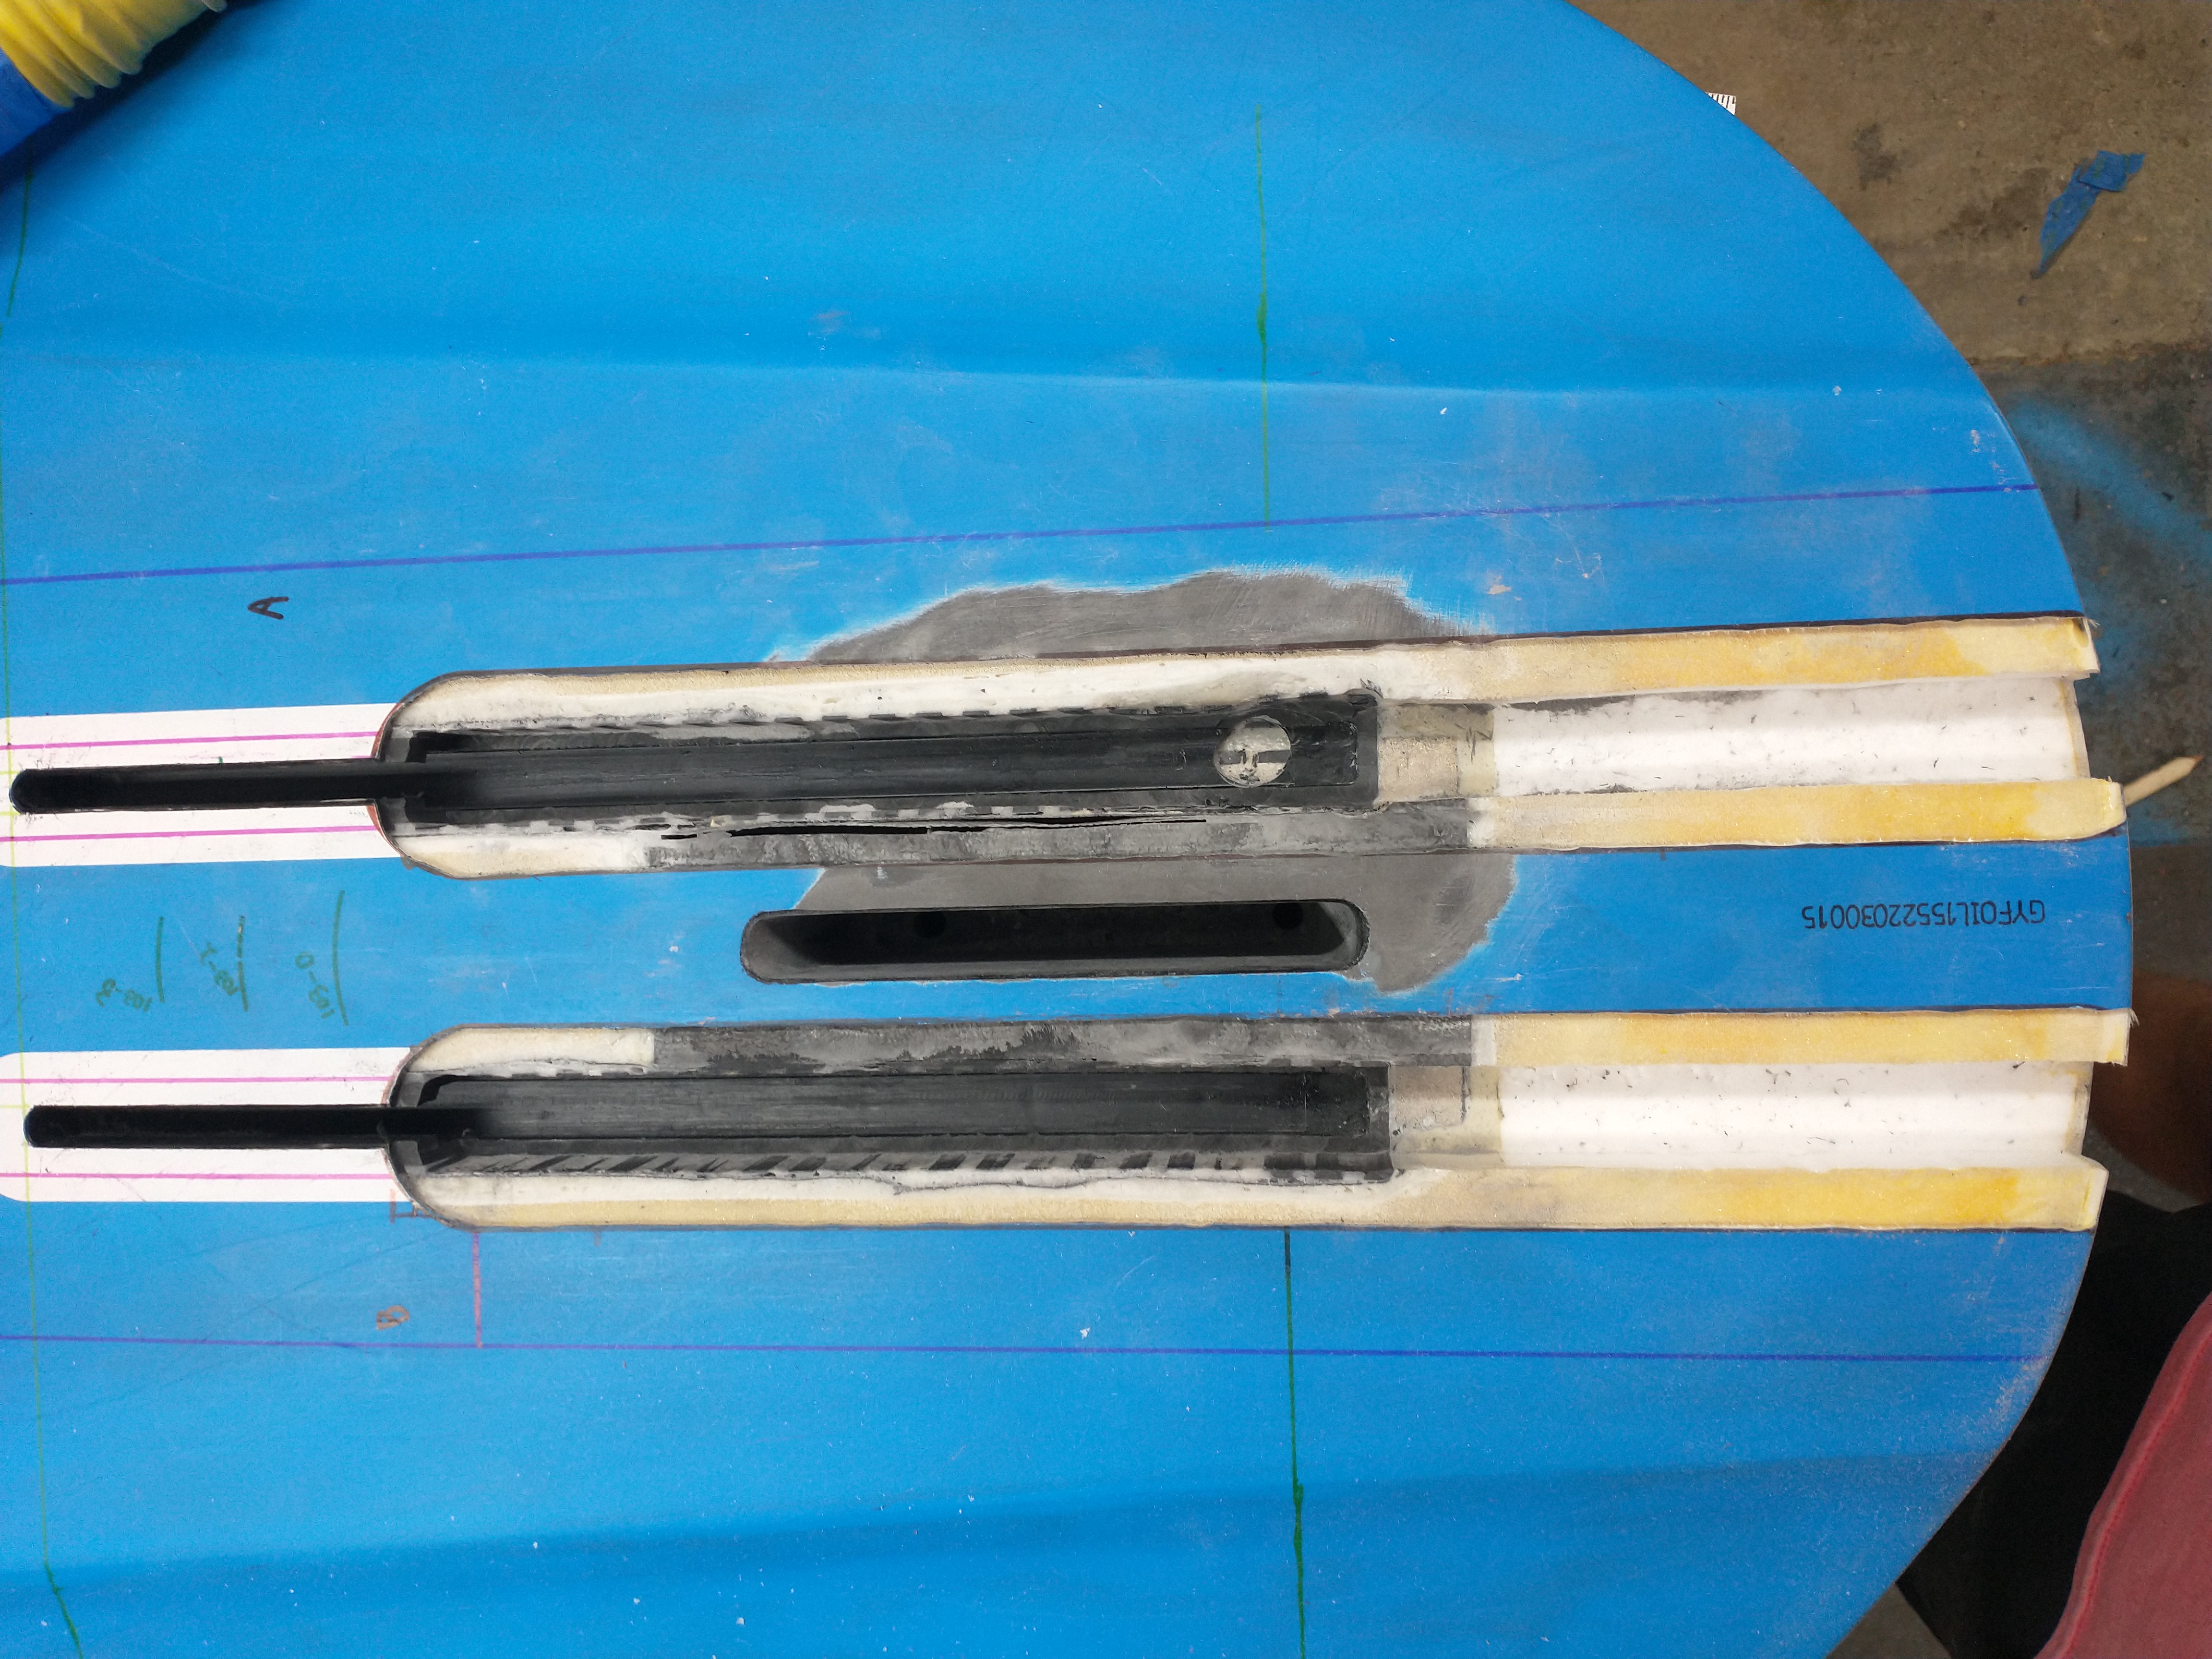
Looking good! Now just superglue the inserts in place and... Wait? What's this? A giant void in the factory installed track layup revealed by the router?!?
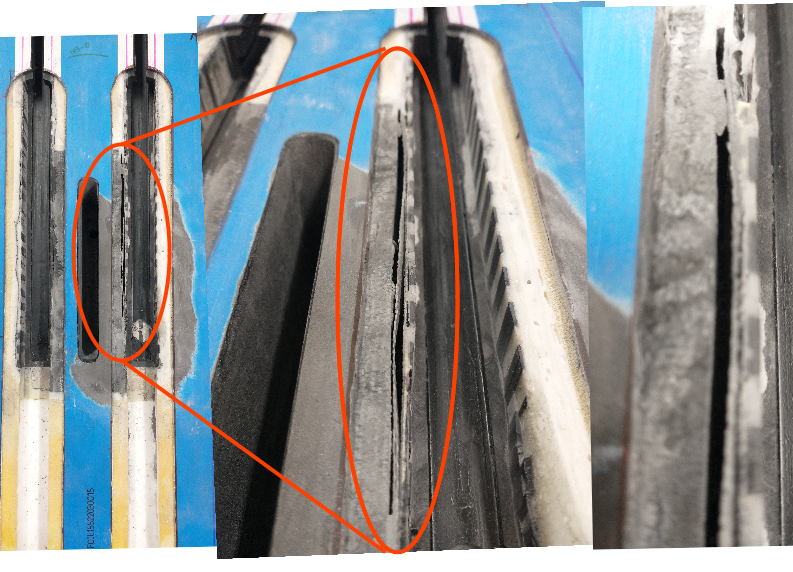
I donno Goya, That's a pretty big void that didn't get enough resin during the board construction, really close to where the crack in the foil track occurred... I'm not saying it caused the track failure, but there's a big part of the the track insert where it's not connected to the rest of the board with epoxy, and that's pretty much where the crack occurred. And opposite track insert doesn't have any big voids along the side of it, and it didn't crack. It's a little bit suspicious, ya know? Sure, I've absolutely voided any kind of warranty by cutting apart the board, and that's ok, because I repaired and greatly improved the thing. But it seems like this might have been something what would have been covered under warranty as a manufacturing defect.
Putting it back together